Difficulty: Easy-Medium
One of the most popular and useful Raspberry Pi projects is to build a Pi-Hole Network-Wide Ad Blocker with Raspberry Pi that filters internet traffic and blocks unwanted ads before they even reach your devices. Think of it as a DNS sinkhole that blocks ads and trackers on every device connected to your home network. It’s one of the best Raspberry Pi projects for privacy and network speed.
To build a Pi-Hole Network-Wide Ad Blocker with Raspberry Pi is surprisingly simple. After installing Raspberry Pi OS on your microSD card, you’ll run a quick installation script provided by the Pi-hole team. Once installed, you can configure your router to route DNS queries through your Raspberry Pi, which will then filter out advertising and tracking domains.
This is a lightweight yet powerful project, ideal for users who want to speed up their browsing and block malicious content across all devices.
What You’ll Need:
- Raspberry Pi 3B+, Raspberry Pi 4, or Raspberry Pi 5 or newer
- I’m using a Raspberry Pi 5 8GB in this project but that is way overkill. Pi-Hole is not resource hungry, I just happen to live near a Micro Center with easy access to new Pi models. You can use something as old as the Pi 2 or 3. I’d suggest staying away from the Pi 0 models unless you have a way to get hardwired ethernet to the MicroUSB port. If you want to run additional projects on your Raspberry Pi you might want to consider a newer, beefier Raspberry Pi.
- 32GB SanDisk Extreme MicroSD Card
- Again, Pi-Hole won’t need a lot, less than 2GB of space. But, these days 16GB cards and smaller are hard to come by if not the same price as a 32GB. You will also have space for more projects with a 32GB card.
- Ethernet cable (Hard wired preferred over wifi for stability, you can even get a POE hat)
- Access to your router settings (Optional)
Best MicroSD Card for PiHole Network-Wide Ad Blocker

32GB MicroSDHC Extreme Sandisk Memory Card (SDSQXAF-032G-GN6MN)
(Pricing as low as $18.45)
Capture more fast action and record more Full HD or 4K UHD video with your Android based smartphone, interchangeable-lens camera,…
How to Set Up your Raspberry Pi for Pi-hole:

- Flash Raspberry Pi OS
- Download Raspberry Pi Imager and flash Raspberry Pi OS Lite for a mode without the UI (or regular Pi OS if you want the UI) to your microSD card.
- Verify the model Pi you are using for 32-Bit or 64-Bit.
- Insert the microSD card into the Pi and power it on.
- Download Raspberry Pi Imager and flash Raspberry Pi OS Lite for a mode without the UI (or regular Pi OS if you want the UI) to your microSD card.


- Connect to the Pi
- Either from your DHCP server or within the Raspberry Pi find your IP address.
- You can use
ip ain the terminal if you connect a keyboard and montior to your Pi. - SSH into the Pi with
ssh pi@<your-pi-ip>where you fill in your raspberry pi IP address.
- Setting up the Pi
- Next, update your Pi OS using
sudo apt-get update && sudo apt-get upgrade -y - Set a static IP address from your DHCP server or use
sudo nano -w /etc/dhcpcd.confto set a static IP address from within your Raspberry Pi.- Uncomment the lines for
interface etho0,static ip_address, andstatic routers - Fill out your chosen IP address and your default gateway
- Reboot your Rasbperry Pi with
sudo reboot
- Uncomment the lines for
- Next, update your Pi OS using


Installing Pi-Hole on your Raspberry Pi
- Installation
- Don’t perform this step without setting a static IP address, you will need to guarantee your new Pi-Hole DNS can always be found at a set IP.
- After a reboot, and reconnecting with SSH (Step 2), run the command
curl -sSL https://install.pi-hole.net | bashto start the installation of Pi-Hole on your Raspberry Pi. - Follow on screen prompts and verify that you have set a static IP.


- Installing Pi-Hole Continued
- Choose the Upstream DNS provider of your choice. I am using a Custom
1.1.1.3for this tutorial, which is through CloudFlare DNS that does Malware and Adult Content blocking. - The wizard will ask if you want to pre-install Steven Black’s Unified Hosts list, definitely choose yes. You will need to find third party lists regardless for blocking ads and this is one we use in the EBS office.
- Install the Admin Web Interface. Install lighttpd and required PHP modules.
- I would suggest enabling query logging, and setting the privacy to show everything. But this is your preference.
- After a couple more confirmations you’ll be at the end. Change the Pi-Hole Admin Password using the command
sudo pihole setpasswordand set it to something memorable.
- Choose the Upstream DNS provider of your choice. I am using a Custom


Managing Pi-Hole Network-Wide Ad Blocker with Raspberry Pi
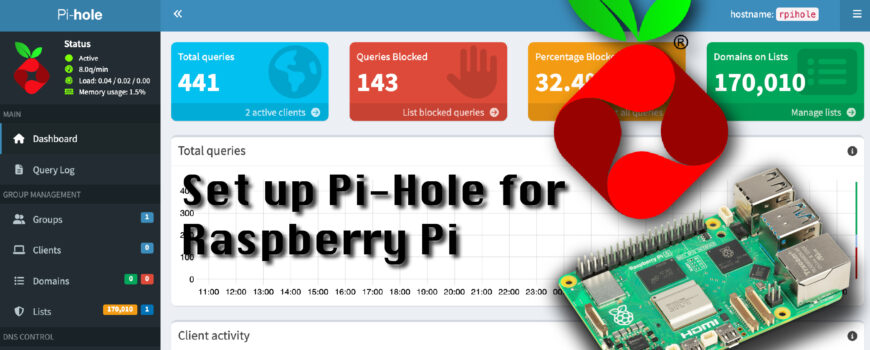
Now that your Pi-Hole is set up you can manage settings through the GUI using any browser on the same network. Go to http://<your-pi-ip>/admin where you use your pi’s ip address instead. There are lots of settings within Pi-Hole, we aren’t going super in depth with those in this article but we suggest looking up more block lists to add to your Pi-Hole.


Connecting to Pi-Hole as preffered DNS
There are 2 primary ways to handle using your Pi-Hole. This step is why we needed a static IP address. The first and most simple is to set your preffered DNS in each device to be the IP address of your Pi. It is more tedious to do this but is also pretty universal. Using this method you will also be able to see each client using the Pi-Hole. We won’t go into how to set this up because each device you use is different, but it will be in the network configuration or wifi configuration for your device.
Alternatively, if you set your DHCP server to use the Pi-Hole as the DNS server then every device on your network using DHCP will automatically get the IP address and use your Raspberry Pi as it’s preffered DNS. It will require you to have network privileges and the ability to edit DHCP settings on your network appliance but it is a faster method to setup on all your devices.